Pages

Tuesday 29 April 2014

High-Bed Shelf Ikea Hack!

It’s been 2 years ago now, since I bought Michael his high-rise bed. It was a great purchase well worth the money. The first thing I though was he would be swinging and jumping off it onto the ceiling light but he has been very good on it actually and no accidents (so far). I'm still expecting to get a few more years from it too. When I decided I was going to buy the bed I knew I wanted to get him something to set his drink and remote control on and I seen one for £20 that would be perfect, but never got round to buying it. By the time I decided I was going to buy it, it had been removed from sale.

After getting new furniture in our living room and moving around Michael’s room he actually had the sad eyes and said “Mum when are you getting me my shelf”. Action had to be taken! After searching for a while there was so many like this one for over £50 but that was too much for me to spend on a shelf at the moment.

I looked online and came across the Ikea Spice Rack and measured it against our cups that he uses for juice and the length was perfect. So ordered one from EBay for £6.90 including postage. I also got some Rustoleum spray paint in Spa Blue for £5.60 from Amazon.

Once it arrived and got it together it looked like this:


 Then after a few coats of primer and a couple of coats of Rustoleum Spa Blue it looked like this:


It didn't come with fittings so we my partner got some and fixed it to the wall. I made sure that it was high enough that he won’t hit or kick it when he’s sleeping (he’s a wriggler). It’s the perfect depth that it doesn't stick out to much and can hold his book, cup and torch.

Even better than I expected!


The next morning I gave him breakfast in bed and he didn't have to get down to fetch his drink anymore. Always a success to make my boy happy!

Morning Sunshine!

Of course I can’t get one without the other so ordered one for my daughter as well for her mid-riser bed. It’s already primed and will be spray painted Pink, our favourite colour. I will update with a photo when it’s done.

High price - £51.99           

My price – £13.50 ( with paint left over as well)


Let me know what you think!

Linked to IHeart OrganizingA Bowl Full Of Lemons ,City Of Creative DreamsFamily, Home and Lifeand Say Not Sweet Anne

creatingreallyawesomefreethings.com/
Perfect Happy Home

Tuesday 22 April 2014

Surprise Wardrobe Sort!

I'm really proud of myself for this cupboard organisation! It was a complete accident.

 I was actually looking for a black vest top that I wear under my work shirt that I thought might have fallen into the pile of shoes I have here. I was in shock at the state the cupboard was in....again. I've tried multiple attempts to organise this space and I’m failing miserably. So I pulled the whole lot out.


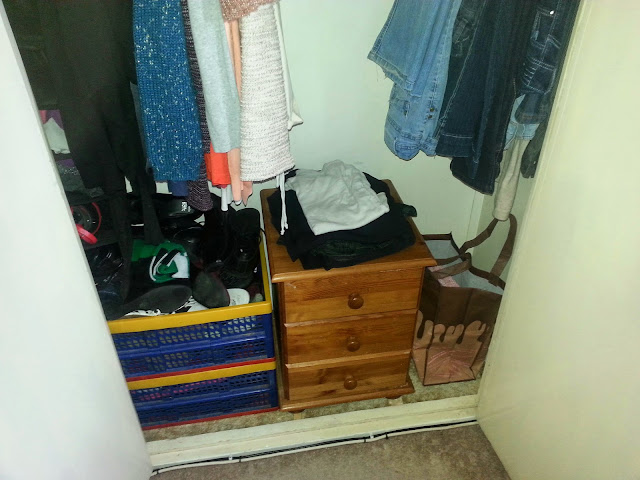
Here is the before photo


The crate on the left held my shoes and the crate on the right was boots. The pile at the end was my handbags and the shopper bag on top has Christmas presents I bought early for this coming year (organised!)

I started by donating/binning the boots, shoes and handbags which were not used in years or I didn't want anymore. I recently bought some new living room furniture and put our old furniture into my sons’ room to create an entertainment centre so he no longer had any use for an old bedside cabinet that held his controllers and headsets. I put this up to my mums’ garage a few days before and thought this might fit in the cupboard. 

I popped up and got it and with a little bit of wood underneath the feet it fitted perfectly! I have now put my under garments in the top drawer, vest tops in the second and my Christmas jumper in the bottom at the moment.

I think it looks perfect! 


The bottom crate now holds my handbags and the top one now holds ALL my footwear (yes I got rid of quite a bit). The OCD in me also cannot resist keeping my clothes in order of colour so that is how it will stay but I did also sort through it and put them to the clothing bank. I always used to chuck my work clothes over a chair or on top of the crate of shoes so I can now fold it neatly on the cabinet. I think this looks fantastic and is working well so far. Not bad organising by an accident and cost £0.


Perfect Happy Home

Linked to A Bowl Full of Lemons Link Party and City of Creative Dreams

Sunday 20 April 2014

Happy Easter Everyone


We have a great day planned for Easter here in sunny Scotland! Our Easter egg hunt starts first with the kids searching in garden, then we will go a drive to find the biggest hill to roll our painted eggs down it. Finishing off with a lovely Chicken Roast Dinner!

I hope everyone has a great day too!


Happy Easter!

Friday 18 April 2014

Easter decoration

With Easter coming up this week I decided to step it up a level this year. We do the special Easter hunt for the kids in the garden and give out chocolate eggs but thought we should celebrate with an egg-cellent display.


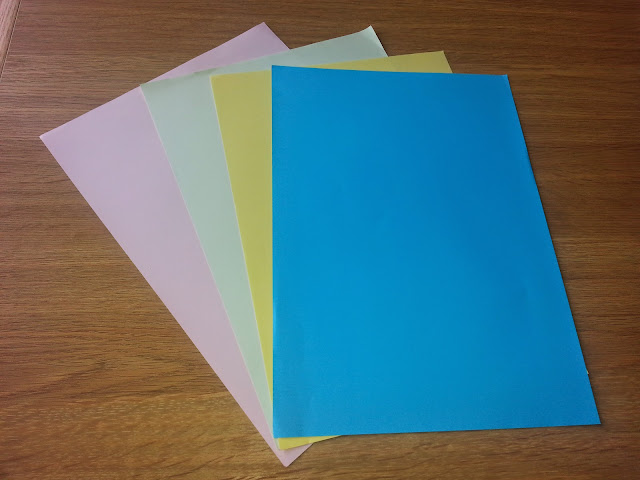
I started by finding a spare basket I got with a Christmas gift and I first of all looked online for shredded tissue paper but a light bulb went off in my head as I thought I could just shred my own from my stock of paper.

Deciding on the colours pink, green, yellow and blue I took the paper to my work and used the shredder there.


I filled the basket with the paper to make it look like a nest


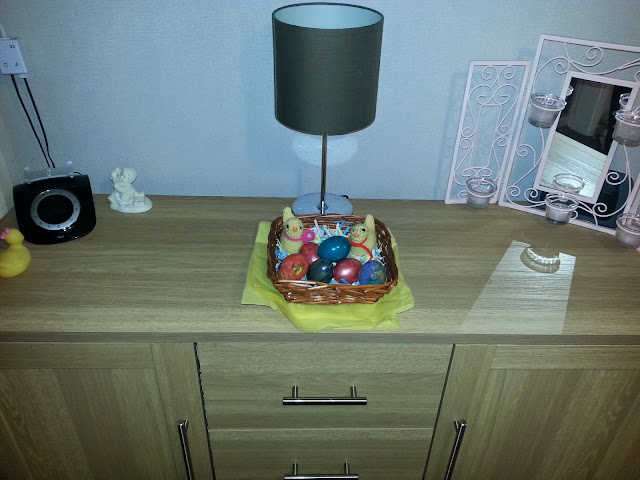
To fill my nest I got a pack of dyes from Lidl and only picked 3 of the colours because they can’t be sealed once opened. I will save the rest for next year. My daughter at the same time painted some with her paints and added some glitter to them (and my floor). I've had the knitted chickens since last year and I filled them again with Cadbury Crème Eggs (yum) and placed them on my sideboard.


I put some yellow tissue paper under the nest. Excuse the rubber ducky to the left.


Completed with a bunny banner. Come Sunday and when the kids start their Easter hunt outside - weather permitting - I can have the rest of their chocolate eggs ready for them when they come inside. Then a trip to the biggest hill we can find for rolling our painted/dyed eggs down them.

Perfect Happy Home

Friday 11 April 2014

My Second Drawer

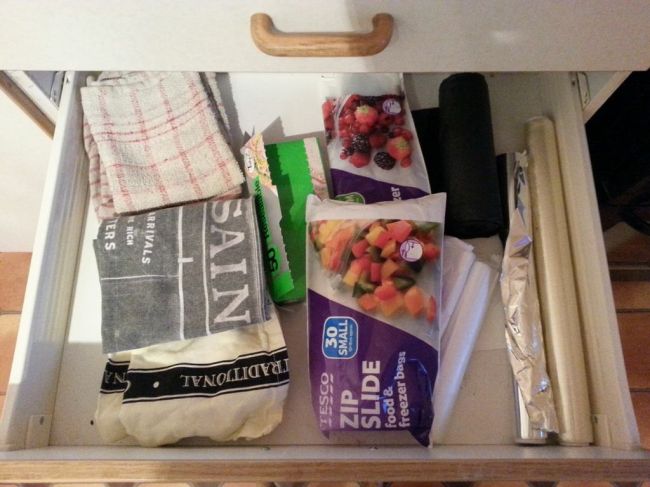
In my kitchen, my second drawer down in my kitchen housed my dish towels and things like tinfoil, sandwich bags and black bin bags. 


Unfortunately it looked like this


Image

Grrrrr....I hated how everything moved around. I also apologise for the lighting in my photos. I'm learning, but unfortunately my kitchen has not got the greatest light in this area.


So I was trying to come up with a solution that rolled around my head for many months before eventually finding the perfect thing! I considered tension rods which came in at around £3.99 each. I also thought of dividers that might keep the towels etc separate. None on them seemed like an easy solution to maintain in the long runs. 


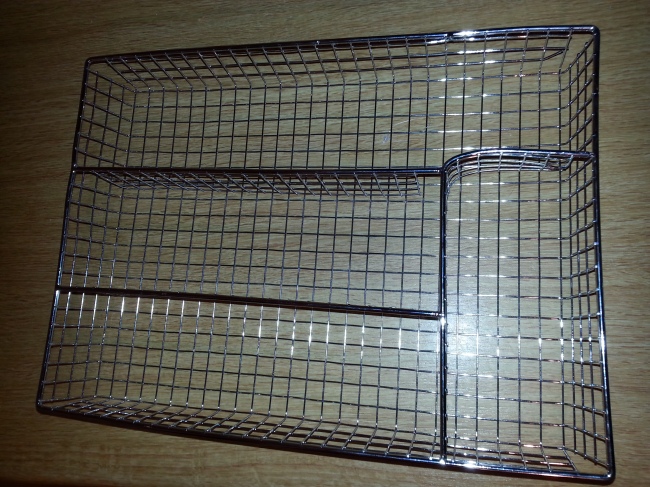
So instead I got one of these!


Image

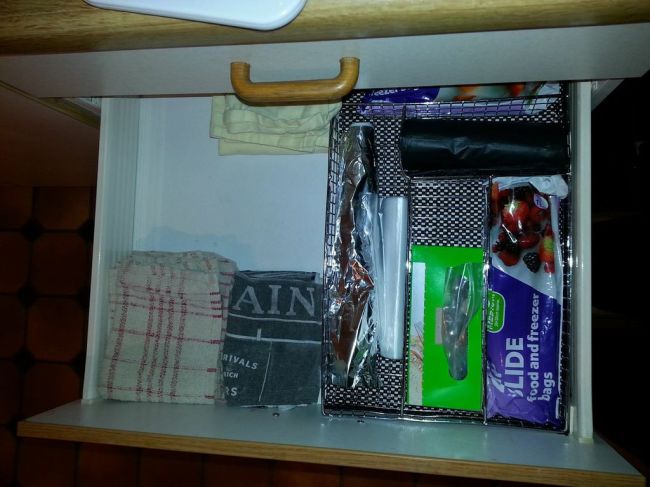
Yes! A cutlery divider! I got my partner to bend one of the sections round so to create a longer section as the tinfoil didn't fit in it so a little snip, a bend and a knock with the hammer and 


TADA!


Image

I'm so happy with the end result! I placed a piece of gripper mat underneath so it wouldn't shoot back and forth when opening the drawer. I now have a section for each thing! I have my clingfilm in another drawer with my grease proof paper as I don't use it as often. Its been a few days now and it appears to be working and is still staying neat and tidy.


Does anyone else have another solution to this problem they can share or perhaps I'm not the first to do this solution. 
Leave a comment of what you think.

Linked to I Heart Organising

Earphone Storage Idea

So while I'm fixing up some of my posts , I'm itching to post something that will get the ball going.  So I thought I would show you my neat and tidy way of storing earphones

I'm sure everyone can agree that tangled, messy earphones are a common find in our drawers in most homes. I got fed up of finding them all over the house as well.

After sorting through the damaged ones and also the ones for phones that we don't own any more I used sandwich bag ties to twist them round together which I have loads of as I don't use them for the sandwich bags.

.20140318_142121

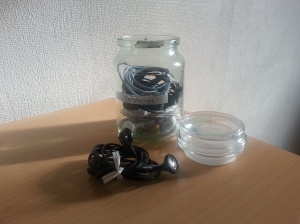
I love reusing coffee jars like these with the sealed lid.
I popped all the tied earphones in the jar, printed a label for it with my wonderful label maker and placed it in my bookcase. Now everyone knows where to go and won't have to spend extra time untangling them.
More posts like this to come! I would love your feedback and suggestions.

See you soon!

My First Post

Hi Everyone!


My first post YAY! I honestly thought this would be easier Let me introduce myself;
My names Alana! I live in Scotland with my partner and two children. I decided to do this after reading lots of amazing blogs from people in America and realised that the UK lacks this great source of information. What better a source than people themselves sharing tips and ideas. I have found loads of inspiration and want to share it all with the world.

My blog is mainly going to be about what I love to do the most - organise and create great spaces in my home! I get excited about baskets, tubs and anything that I can use to contain something. I will soon post up some of the organising that I have finished, I have some great ideas to share and can't wait to hear feedback.

See you soon!